In general, when you provision a Linux Compute the default size of boot disk will be 47 GB and sometimes this may not sufficient when the server usage keeps increasing. Even though while creating a Compute you have a flexibility of sizing the boot disk, we often miss to set or you may not be sure the initial sizing requirements.
This post will detail the steps on how to resize the root disk in Linux. Good news is that Oracle has provided a simple utility to resize root disk (/) in a simple and safer way.
As part resize first step is to resize Boot Volume in OCI.
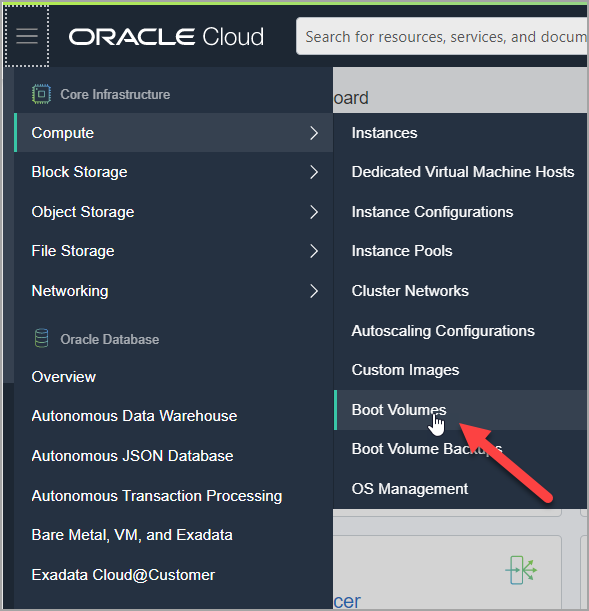
Login to OCI, Open the navigation menu. Under Core Infrastructure, go to Compute and click Boot Volumes.
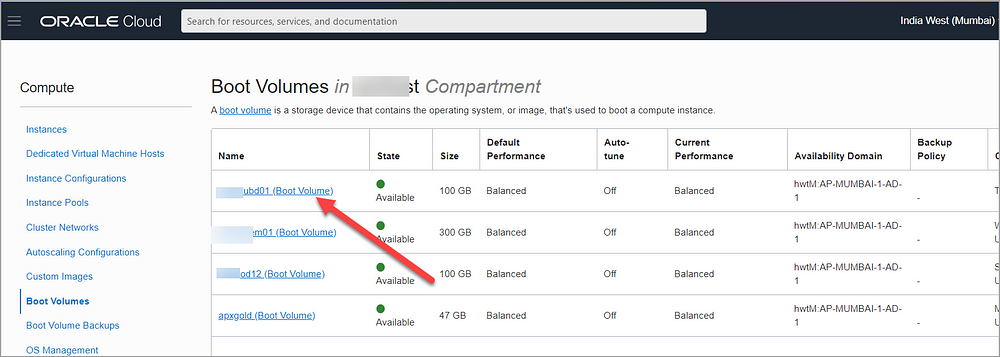
In the Boot Volumes list, click the boot volume you want to resize.
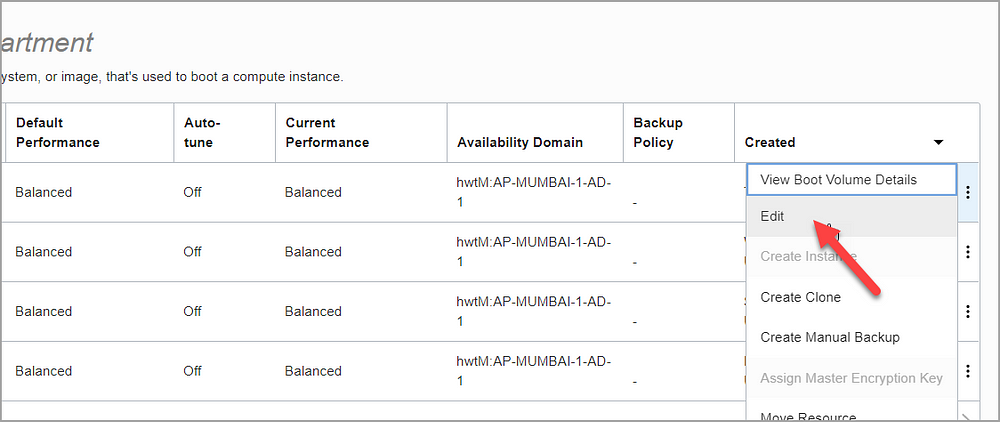
Then choose three dots and click Edit

Specify the new size in VOLUME SIZE (IN GB). You must specify a larger value than the boot volume’s current size (for e.g. 100GB)

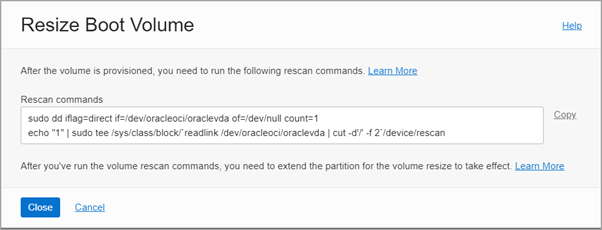
Click Save Changes. This opens a dialog that lists the commands to rescan the disk that you need to run after the volume is provisioned.
You need to run these commands so that the operating system identifies the expanded volume size.
Now the resize of boot volume is completed successfully in OCI. We need to now proceed with steps to be performed Linux box.
Login to Linux VM as root user and run the OCI commands from above step.
# sudo dd iflag=direct if=/dev/oracleoci/oraclevda of=/dev/null count=1
# echo “1” | sudo tee /sys/class/block/`readlink /dev/oracleoci/oraclevda | cut -d’/’ -f 2`/device/rescan

oci-growfs is available as part of oci-utils rpm for Oracle Linux 7& 8. If the compute is installed from OCI standard image this will be available by default. If the image custom, we need to install oci-utils rpm manually.
Extend the partition and grow the file system using the oci-growfs as below
# /usr/libexec/oci-growfs
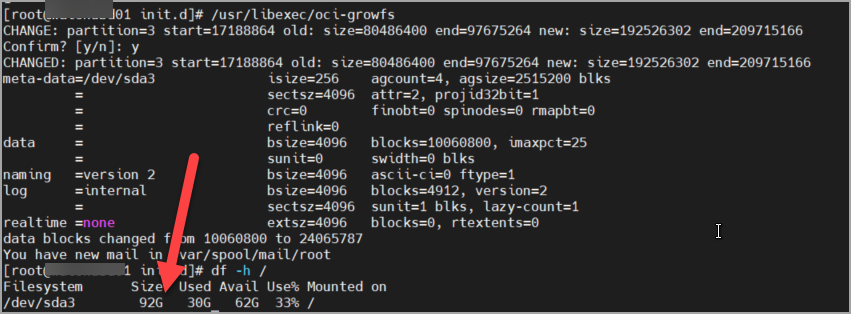
Yoo! Boot disk resize is completed successfully.
Note: This action plan tested and works for Oracle Linux 7.